However, for those who have never used them before, they may seem daunting, and questions about their usage and benefits may arise.
In this article, we will explore some of the most frequently asked questions about mini loaf pans. We will discuss the various types of mini bakeware available, their materials, and their sizes. We will also cover how to properly use and care for mini loaf pans, as well as some creative ways to incorporate them into your baking routine.
We also attempt to address some common misconceptions about mini loaf pans and provide helpful tips to make the most out of your baking experience.
Whether you are a seasoned baker or just starting out, I am sure this post will help you answer some pressing questions and give you tips to help you make the most out of your mini pans.
Frequently Asked Questions
Do mini loaf pans take less time to bake?
Mini loaf pans can take less time to bake than standard loaf pans, as the smaller size means that the bread will cook faster.
However, the exact baking time will depend on the recipe, the size of the pans, and the oven temperature.
It’s important to follow the recipe instructions carefully and keep a close eye on the bread as it bakes to ensure that it doesn’t overcook or burn.
As a general rule, mini loaves will typically take about half the time to bake as a standard loaf, but this can vary.
For example, a recipe that calls for a 9-inch loaf pan might take around 45-60 minutes to bake, while mini loaves made in a 3.5-inch pan might take around 20-25 minutes to bake.
The best way to determine the exact baking time is to check the bread regularly, and use a toothpick or cake tester to test for doneness.
What can I use instead of mini loaf pans?
- Muffin tin: A standard muffin tin can be used to make mini loaves by dividing the batter evenly between the muffin cups. The baking time may need to be adjusted, but this can be a good alternative if you don’t have mini loaf pans.
- Ramekins: Small ramekins or individual baking dishes can be used too. They may need to be greased or lined with parchment paper to prevent sticking.
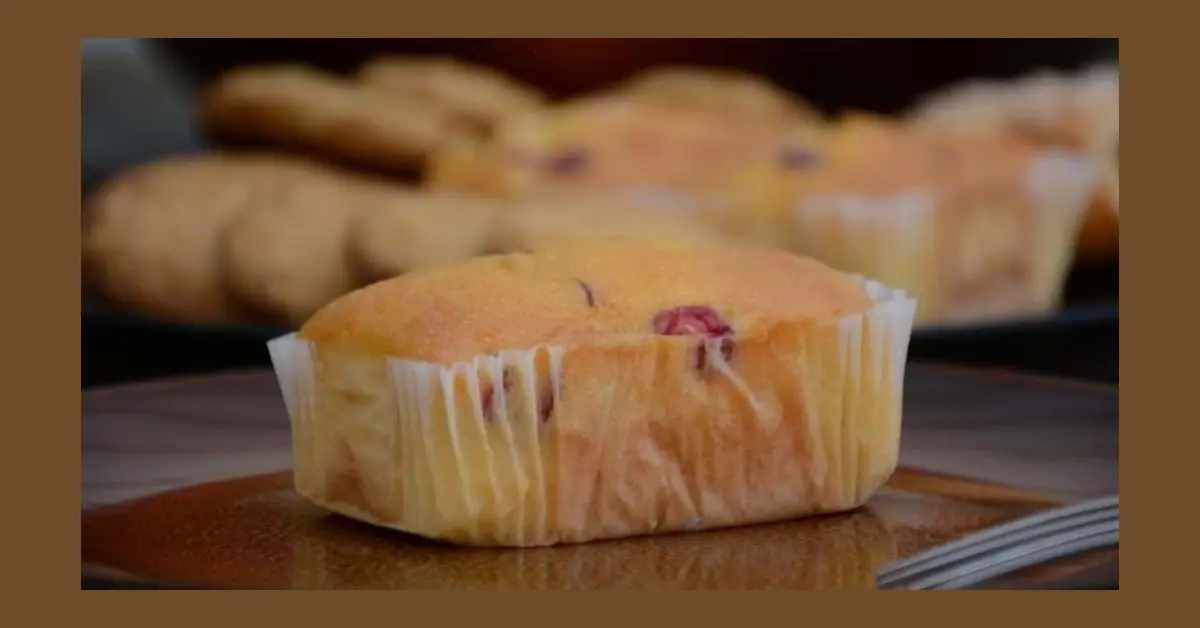
- Disposable baking cups: These can be used to make mini breads. You can also use paper baking cups instead. These are often used for baking cupcakes, but can also be used for mini loaves.
- Bread machine: If you have a bread machine, you can use the dough cycle and start by dividing the dough into smaller portions and shaping them into mini loaves. These can then be baked in a standard loaf pan or on a baking sheet.
These alternatives may require some adjustments to the recipe or baking time, so it’s important to keep a close eye on the bread as it bakes and adjust as needed.
What do you use mini loaf pans for?
- Mini bread loaves: The most obvious use for mini loaf pans is to make small loaves of bread. These can be used for a variety of purposes, from serving alongside a meal to giving as gifts.
- Mini cakes: They can also be used to make individual-sized cakes. This can be a fun way to experiment with different flavors and decorations.
- Meatloaf: Small bread pans can also be used to make individual servings of meatloaf. This can be a convenient way to portion out meals for a family or for meal prep.
- Brownies and bars: You can make small servings of brownies or other bar desserts. This can be a great option for small households or for portion control.
- Terrines and pâtés: These are typically made with meat or fish and served as a starter or appetizer.
How do you adjust the baking time on a mini loaf pan?
- Start with the recipe: Follow the recipe instructions for baking time, but be prepared to adjust the time if needed.
- Check the bread early: Start checking the bread a few minutes before the recipe’s recommended baking time. Insert a toothpick or cake tester into the center of the bread to check for doneness.
If it comes out clean or with a few crumbs, the bread is done. - Keep an eye on the bread: Check the bread every few minutes until it’s done. Don’t rely solely on the recommended baking time in the recipe.
- Adjust the temperature: If the bread is browning too quickly or isn’t cooking through in the center, you may need to adjust the oven temperature.
Lower the temperature by 25°F (10°C) and keep an eye on the bread. - Experiment: Baking time can vary depending on the recipe, the size of the pans, and your oven. Experiment with different baking times and temperatures until you find what works best for your specific situation.
Remember, baking is both an art and a science, and it may take a few tries to get the perfect baking time for your baking pans.
Do you grease mini loaf pans?
- Start with a clean pan: Wash the pan in warm, soapy water and dry it thoroughly.
- Choose your grease: There are several options for greasing a pan, including butter, oil, or cooking spray. Choose the option that works best for you.
- Apply the grease: Use a pastry brush or paper towel to apply a thin, even layer of grease to the inside of the pan. Be sure to get into all the nooks and crannies.
- Add the batter: Once the pan is greased, add the bread batter to the mini loaf pan.
- Bake as directed: Follow the recipe instructions for baking time and temperature, and check the bread for doneness according to the recipe.
By greasing your bread pans before baking, you’ll ensure that your bread comes out of the pan easily and with minimal sticking.
How much batter goes into a mini loaf pan?
This will give the bread enough room to rise without overflowing the pan.
If you overfill the pan, the bread may not cook evenly, and it may be difficult to remove from the pan. If you underfill the pan, the bread may come out too thin or flat.
To get a better estimate of how much batter to use, you can check the manufacturer’s instructions for the loaf pan. They may provide guidance on the ideal amount of batter to use for their specific pan size.
Additionally, you can try measuring the amount of batter using a measuring cup, and adjust the amount as needed based on the size of your bakeware.
How many mini loaf pans equal a 9x13 pan?
Assuming you are using standard mini pans that are about 5.75 x 3 inches, you could use three to four mini loaf pans to replace a 9×13 inch baking pan.
This would give you a similar volume of baked goods, although the shapes may be different.
Keep in mind that the baking time may need to be adjusted when using mini pans instead of a larger baking pan. It’s best to follow the recipe instructions and check the bread frequently for doneness.
How do you cut parchment paper for mini loaf pans?
- Measure the size of your mini pans: The dimensions of the pans can vary, so measure the length and width to determine how much parchment paper you’ll need.
- Cut a strip of parchment paper: Using a sharp pair of scissors or a knife, cut a strip of parchment paper that is slightly longer than the length of the pan and wide enough to line the bottom and sides.
- Fold: Fold the strip of parchment paper in half lengthwise so that it forms a crease down the center.
- Cut: Cut along the crease with your scissors or knife to create two separate pieces of parchment paper, each with a folded edge.
- Fit into the dough pans: Press each piece of parchment paper into pan, folding the edges over the sides, if necessary.
The parchment paper should fit snugly against the bottom and sides. - Grease: Once the parchment paper is fitted into the mini loaf pan, grease it lightly with cooking spray or butter. This will help the bread to release from the pan easily once it’s baked.
By following these steps, you can easily cut parchment paper to fit your pans and ensure that your bread comes out of the pan cleanly.
How do you wrap mini loaves for bake sale?
- Allow to cool completely: Make sure the loaves have cooled completely before wrapping them. If they’re still warm, they may steam inside the wrapper and become soggy.
- Cut the wrapping paper: Cut squares of cellophane or wrapping paper that are large enough to cover each mini loaf with some extra on the sides to twist and tie.
- Place it right: Position the loaf in the center of the wrapping paper, leaving enough paper on the sides to cover it completely.
- Fold the wrapping paper: Bring the opposite corners of the wrapping paper together and fold them over the top of the bread. Then, fold the sides of the paper towards the center, making sure the edges overlap.
- Tie the wrapping paper: Twist the excess wrapping paper at the top of the baked dish to seal it, and tie it with a ribbon or twist tie. Make sure the paper is tight enough to keep the loaf fresh, but not so tight that it squashes the bread.
- Label the loaves: Write the name of the bread on a small tag or label, and tie it to the ribbon or twist tie.
- Repeat for the remaining bread: Repeat the process for all of the loaves you want to wrap.
Wrapping bread loaves is a great way to protect them during transportation and display them attractively at a bake sale. You can also create beautiful and tempting baked goods that are sure to be a hit with customers.
How do you line a mini loaf pan?
- Cut a strip of parchment paper: Measure the width of your mini loaf pan and cut a strip of parchment paper that is slightly longer than the length of the pan and wide enough to line the bottom and sides.
- Place the parchment paper in the pan: Gently press the strip of parchment paper into the pan, making sure it sits snugly against the bottom and sides. The excess paper should hang over the edges of the pan.
- Grease the pan: Use a pastry brush or paper towel to spread a thin layer of butter or cooking spray on the bottom and sides of the pan, over the parchment paper.
- Add the batter: Pour the batter into the lined pan, filling each cavity about two-thirds full.
- Bake: Place the pan in the oven and bake according to the recipe instructions.
- Remove the bread from the pan: Once the bread is fully cooked, use the overhanging parchment paper to lift it out of the pan. Gently peel away the parchment paper from the sides of the bread.
By lining your baking pan with parchment paper, you can help ensure that your bread comes out of the pan cleanly and looks as good as it tastes.
Can I use Pam to grease a loaf pan?
Using cooking spray is a convenient way to grease as it can help prevent your bread from sticking to the pan, and make it easier to remove from the pan once it’s baked.
To use Pam cooking spray, simply hold the can about 6 inches away from the pan and spray a thin, even layer over the entire surface of the pan, making sure to cover the corners and sides.
Make sure to follow the instructions on the can carefully and use the spray only as directed.
Can you use olive oil to grease a bread pan?
It can be a great alternative to traditional baking sprays or butter for greasing bread pans, as it provides a light coating that can help prevent the bread from sticking to the pan. Here’s how to grease a bread pan with olive oil:
- Pour a small amount of olive oil into the bread pan. You only need a thin coating of oil, so start with a tablespoon or two.
- Use a pastry brush or paper towel to spread the oil around the bottom and sides of the pan. Make sure to cover all areas, including the corners and edges.
- Add your batter to the pan and bake according to the recipe instructions.
- Once the bread is finished baking, let it cool in the pan for a few minutes before removing it. Use a knife or spatula to loosen the edges of the bread from the pan, then turn the pan upside down to release the bread.


